
Want to make restaurant-worthy taco meat recipe in just 15 minutes?
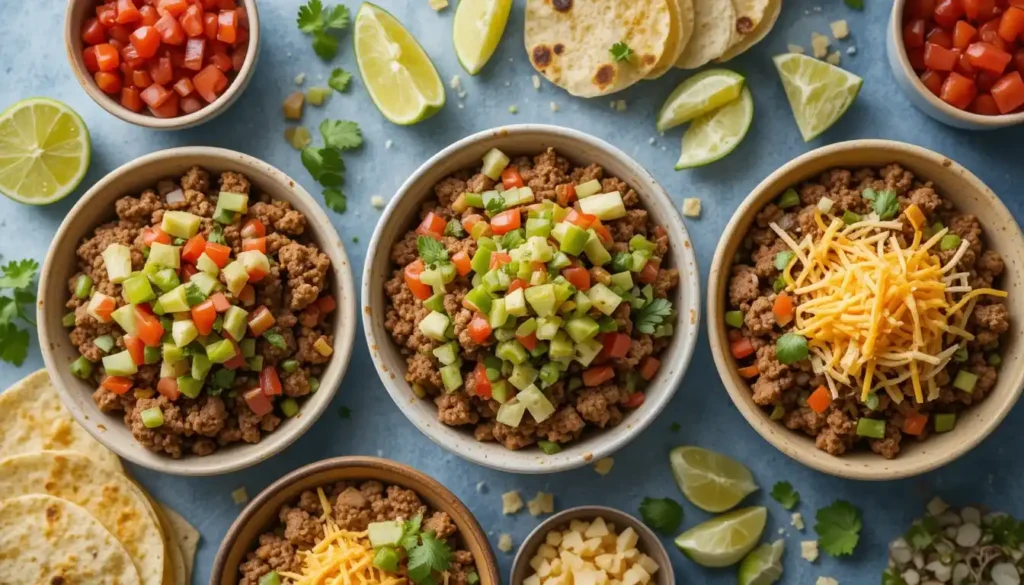
A delicious taco meat recipe doesn’t need hours in the kitchen or a long list of ingredients. Your family’s Taco Tuesday or weekly meal prep will taste amazing with less than 10 ingredients. You can create those perfect flavors you love from your favorite Mexican restaurant right at home.
The magic happens when you pick the right meat and season it well. An 85/15 lean ground beef blend works perfectly. Our extensive testing has revealed a foolproof recipe that delivers incredible results every time. You can adjust the seasonings to match your family’s priorities, just like the pros do.
Ready to raise your taco game? Let’s tuck into the steps you need to create perfectly seasoned, restaurant-quality taco meat in your kitchen.
Table of contents
Choosing the Right Meat

The right cut of meat is the foundation of great taco meat. Expert chefs know that their choice will substantially affect both flavor and texture.
Best cuts for ground beef tacos
Ground chuck stands out as the top choice to make taco meat. We picked it because of its rich, beefy flavor. On top of that, it has ground sirloin as a leaner option that stays tender. The shoulder region of ground beef gives consistent results because of its perfect fat distribution – a quality you’ll find in many restaurants.
Ideal fat percentages
Fat content is vital to create juicy, flavorful taco meat. 80-85% lean meat content gives the best results. This balance will give a moist result during cooking without becoming too greasy. The 80/20 lean-to-fat ratio helps the meat hold its structure and absorb seasonings properly.
Leaner cuts (90% or higher) might dry out and need extra moisture while cooking. These cuts work great with sauces or other liquid ingredients in your recipe.
When to use chicken instead
Beef might be classic, but chicken has its own advantages in certain taco recipes. Ground chicken has much less fat – about 8.1 grams per 100-gram serving compared to 12.8 grams in lean ground beef. Chicken’s neutral flavor base readily soaks up seasonings.
Chicken might be your best bet when:
- You need a lighter option – chicken has fewer calories than beef
- Your recipe uses bold seasonings – chicken’s mild flavor won’t overpower spice blends
- Time is short – chicken cooks faster to reach safe temperatures
Ground chicken pairs beautifully with citrus-based marinades and lighter, fresher toppings. The meat needs to reach 165°F internally to be safe.
Money-wise, chicken is easier on your wallet at $1.95 per pound while beef costs $5.48 per pound. Both meats taste great when cooked right.
Switching between beef and chicken tacos? Each meat brings something special to the table. Beef’s higher myoglobin content creates a richer, more robust flavor profile. Chicken adapts well to different seasoning combinations and keeps things light.
Professional Meat Preparation
Professional taco meat preparation is the foundation of authentic restaurant-style tacos. The right techniques will give your taco meat perfect texture and consistency every time.
Breaking down meat properly
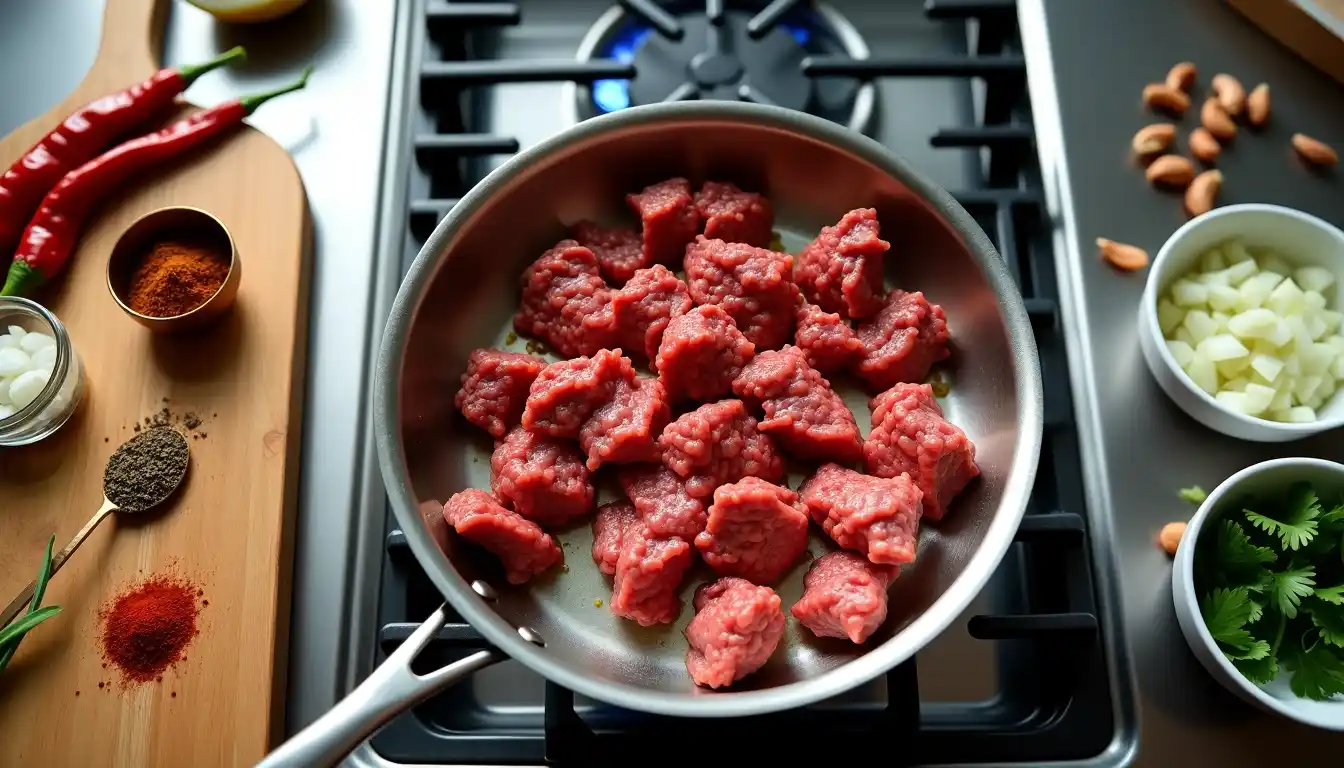
The signature restaurant texture starts with breaking down the meat the right way. Spread the ground meat in a single layer across your pan and let it brown without touching it. Then break the meat into smaller, uniform pieces with a wooden spoon or spatula.
These professional techniques will help you get that distinctive restaurant-style consistency:
- Process cooled, cooked meat in a food processor with short pulses until you see uniform, small crumbles
- Break down the meat as you cook to avoid large chunks
- Let the meat dry completely before adding seasonings to get the best texture
A vital step many people miss involves treating the meat before cooking. Mashing the beef with baking soda and salt for 15-60 minutes raises its pH level and makes the meat more tender. This step helps the meat stay juicy while it cooks.
Temperature control tips
The right temperature control is key to food safety and the best results. Heat your skillet to medium or medium-high heat. The meat needs specific temperature attention during cooking:
Your meat must reach a safe internal temperature of 160°F. Proper cooling matters just as much. Let the meat rest at room temperature for about 30 minutes before it goes in the fridge.
Keep these temperature guidelines in mind for safe storage:
- Store ground beef at 40°F or below
- Use refrigerated meat within 2 days
- Don’t leave meat at room temperature for more than 2 hours
- Cut standing time to 1 hour if temperature goes above 90°F
Your pan’s temperature affects how well the meat releases its natural liquids. Cook at medium-high heat until all liquid evaporates. Then add your seasonings and extra liquids to get the consistency you want.
For prep work ahead of time, let the meat cool completely before you store it. The meat mixture stays good up to 3 days in the fridge. You can keep it frozen for up to 3 months.
To reheat, bring the meat to a gentle simmer over medium heat. Add a little water if needed to keep the right consistency. This helps your taco meat keep its restaurant-quality texture and flavor even after storage.
The meat’s fat content affects cooking temperature and time. Fattier meats might need longer cooking time to brown properly instead of boiling in their juices. Steady heat helps create that perfect balance between moisture and texture that makes restaurant-quality taco meat special.
Restaurant-Style Seasoning Method
You need to become skilled at seasoning to create that signature restaurant-style taco flavor. Professional chefs know the perfect blend comes from both technique and timing.
Essential spice combinations
Chili powder, cumin, and paprika form the foundation of authentic taco seasoning. These core spices build the base flavor profile. Garlic powder, onion powder, and dried oregano add more depth. A pinch of cayenne pepper or red pepper flakes lets you control the heat levels.
Layering flavors like pros
Professional chefs build complex flavors through strategic layering. Mix cornstarch-based seasonings with non-cornstarch blends to get that thick, restaurant-style consistency. This method keeps the meat from becoming too loose or falling apart.
To develop the best flavor:
- Add base spices when browning meat
- Mix in aromatic seasonings after meat is partly cooked
- End with heat elements and dried herbs
Making homemade seasoning blends
You can skip store-bought packets and create your own signature blend. A professional-grade mixture needs:
- 4½ teaspoons chili powder
- 1½ tablespoons corn flour
- ½ teaspoon each of onion powder, garlic powder, and seasoned salt
- ½ teaspoon paprika
- ¼ teaspoon cumin
This homemade blend gives better flavor without artificial fillers or preservatives. The mixture stays fresh up to 6 months in an airtight container. Each batch makes about 2 tablespoons, equal to a standard store-bought packet.
Proper seasoning timing
Getting restaurant-quality results depends on timing. Brown the meat completely first. Then drain excess water and grease well. This helps the seasonings absorb better.
Put the meat back in the skillet and add your seasoning blend. Pour in ½ to 1 cup of water. Let it simmer until most liquid evaporates, usually about 20 minutes. This helps seasonings sink deep and creates that signature thick consistency.
Professional techniques to improve flavor:
- Heat dried spices in hot oil before adding meat
- Add seasonings gradually while cooking
- Give spices enough time to meld while simmering
Your homemade seasoning works great in many dishes beyond tacos, from meatloaf to chicken rubs. You can adjust spice levels to your taste – add more cayenne for extra heat or use less chili powder for milder flavor.
Note that fresh spices give bolder, stronger flavors. Check your spice cabinet often and replace seasonings older than six months. This attention to detail sets restaurant-quality taco meat apart from basic preparations.
Mastering the Cooking Process
Becoming skilled at cooking perfect taco meat depends on two crucial elements: getting that ideal brown crust and keeping the right amount of moisture while cooking.
Perfect browning technique
Rich flavors start with good browning. Let the meat sit at room temperature for 15 minutes before you start cooking. Get a stainless steel or cast iron skillet hot over medium-high heat – stay away from non-stick pans since they don’t hold heat well enough.
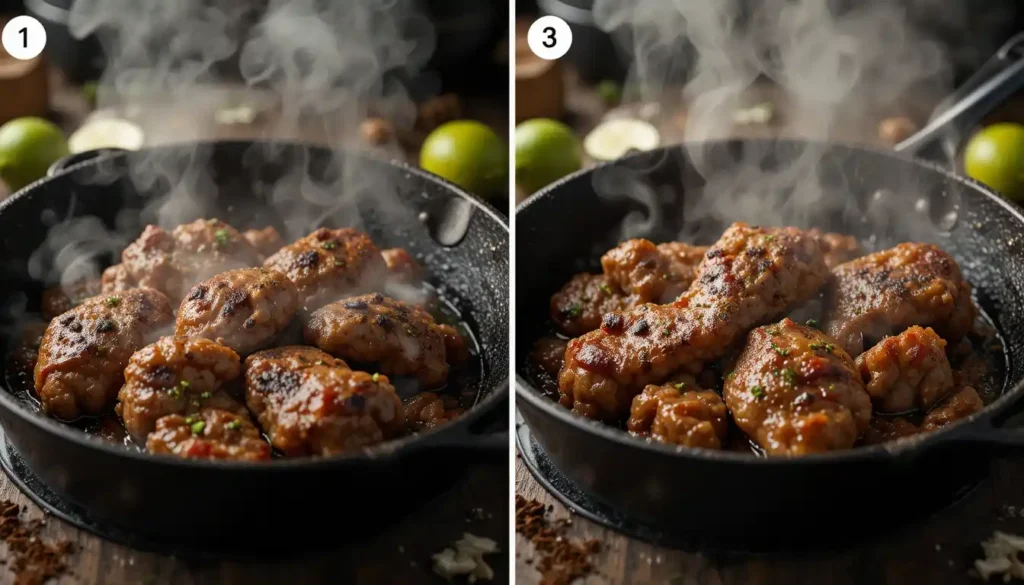
The pan should be nice and hot before you spread the meat in an even layer. Leave it alone for about 5 minutes so it can develop a tasty brown crust. This original searing creates deep, savory flavors through the Maillard reaction.
After the first sear, break the meat into smaller pieces and stir now and then instead of constantly. This helps water evaporate properly, so your meat browns instead of steams. The quickest way to get great results is to wait about a minute between stirs, letting the meat stay in contact with the pan.
Managing moisture levels
The difference between restaurant-quality and home-cooked taco meat comes down to moisture control. Once you’ve got good browning, get rid of extra fat by carefully tipping the pan and taking out the liquid with a slotted spoon or turkey baster. You’ll keep all the flavor but lose the grease.
Now add water or beef broth to create that perfect texture. For each pound of meat, you’ll need:
- 2 cups of liquid to start simmering
- More liquid as needed to keep meat half covered
- Last 10 minutes uncovered to thicken the sauce
Taco seasoning has cornstarch that needs water and heat to thicken properly. Your meat will be dry and fall apart in the taco shells if there isn’t enough moisture. Mix in about ¾ cup water for every pound of seasoned meat and simmer until it thickens.
If you’re cooking for a while, keep the moisture right by:
- Simmering covered on low heat
- Breaking up meat every 10 minutes
- Adding liquid as needed while cooking
Some restaurant kitchens use a different approach by cooking the meat in water first, then adding seasonings. This makes the meat very tender, though most restaurants stick to the traditional browning method.
To make ahead, let the meat cool completely before storing. Your taco meat will stay good in the fridge for 3-4 days. Add a splash of water while reheating if needed to bring back the right texture.
The meat should end up slightly saucy, not dry. This keeps everything tender and flavorful, and the meat won’t fall out of your tacos. Let the mixture simmer uncovered in the final minutes until it reaches just the right consistency.
Texture and Moisture Control
The perfect texture in taco meat comes from understanding the science of moisture control. Professional chefs use specific techniques that create signature restaurant-style consistency. Their customers keep coming back for more because of this special texture.
Getting the right consistency
Restaurant-quality taco meat’s secret lies in its fine, almost creamy texture. Professional kitchens break down the meat properly, unlike home-cooked versions that often turn dry and crumbly. A potato masher is a great way to get uniform, fine pieces of meat. This technique will give a perfect hold when served.
The distinctive restaurant texture comes from using a food processor to pulse the cooked meat 5-6 times. Smaller, consistent pieces stay together better in tortilla shells. Another approach creates a slurry by mixing raw ground beef with water before cooking. Many popular establishments use this method to achieve that paste-like consistency.
Adding liquid ingredients
Proper liquid incorporation forms the life-blood of moisture control. Each pound of meat needs about ¾ cup of water. These precise measurements help blend seasonings properly and maintain ideal moisture levels.
Several liquid options boost both texture and flavor:
- Low-sodium beef broth adds depth and provides needed moisture
- Tomato sauce creates a silky, savory coating that prevents dryness
- A combination of beef broth and tomato paste develops rich umami notes
Seasoning mixes contain cornstarch that needs specific liquid ratios. Add ⅓ to ½ teaspoon of cornstarch per pound of browned, spiced meat with ¾ cup of water. Heat activates the cornstarch and creates that smooth, restaurant-style sauce coating each meat particle.
The seasoned meat should simmer until most liquid evaporates. This process takes about 20 minutes and results in perfectly textured meat. Some restaurants boost moisture retention through longer cooking periods. They simmer the meat up to an hour while keeping consistent liquid levels.
Professional kitchens use a two-stage moisture control process. They drain excess fat after the original cooking to preserve essential flavors. Next, they add carefully measured amounts of liquid to create that signature consistency. This method keeps the meat moist without becoming greasy or waterlogged.
Note that lean-to-fat ratios affect moisture retention. An 80/20 blend gives optimal results because the fat content helps maintain moisture throughout cooking. Leaner options need slightly more liquid to make up for reduced natural fat content.
Conclusion
Quality taco meat from your kitchen needs a few essential elements. The right meat choice with 80-85% lean content builds a strong base. Expert prep methods and precise seasoning choices reshape the scene from basic ground beef to something special.
The cooking process demands proper browning and moisture control. Rich flavors develop when you take your time to sear and season with care. The perfect texture comes from properly breaking down the meat while keeping ideal moisture levels as you cook.
These expert methods and tips will help you create taco meat that matches your favorite Mexican restaurant’s quality. Perfect your technique with small batches before scaling up for bigger events or meal prep. Your ideal flavor profile emerges when you adjust the seasonings and moisture to your taste.
FAQs
Q1. How do restaurants achieve that fine texture in taco meat? Restaurants often use techniques like simmering the meat in liquid, constantly breaking it up with a potato masher, or pulsing cooked meat in a food processor. This results in a finer, more uniform texture that’s characteristic of restaurant-style taco meat.
Q2. What’s the secret to flavorful taco meat? The key is using the right combination of spices and proper seasoning technique. A blend of chili powder, cumin, garlic powder, and onion powder forms a good base. Toasting the spices in the pan before adding liquid can enhance flavors. Some chefs also layer seasonings throughout the cooking process for depth.
Q3. How can I prevent my taco meat from being greasy? Use leaner ground beef (80-85% lean) and drain excess fat after browning. Some chefs also use a potato masher to break up the meat while cooking in a small amount of water, which helps achieve a less greasy texture. Proper moisture control during cooking is crucial.
Q4. What’s the best way to season taco meat? Start by browning the meat, then drain excess fat. Add your seasoning blend (homemade or store-bought) along with about 3/4 cup of water per pound of meat. Simmer until the liquid reduces and the meat reaches your desired consistency, usually about 20 minutes.
Q5. Can I make taco meat ahead of time? Yes, taco meat can be prepared in advance. After cooking, allow it to cool completely before storing in an airtight container. It will keep in the refrigerator for 3-4 days. When reheating, you may need to add a small amount of water to restore the original texture.
Print
How to Make Restaurant-Quality Taco Meat: A Foolproof Recipe
- Total Time: 30 minute
- Yield: 4 servings 1x
- Diet: Low Fat
Description
Make restaurant-quality taco meat at home with this easy recipe perfect for Taco Tuesday or meal prep
Ingredients
- 1 pound 85/15 ground beef
- 4½ teaspoons chili powder
- 1½ tablespoons corn flour
- ½ teaspoon onion powder
- ½ teaspoon garlic powder
- ½ teaspoon seasoned salt
- ½ teaspoon paprika
- ¼ teaspoon cumin
- ¾ cup water
- ½ teaspoon baking soda optional
Instructions
1. Prepare the Meat
Spread ground beef in a skillet over medium-high heat Let it brown without stirring for 5 minutes Break into small pieces with a spoon
2. Add Seasoning
Drain excess grease Mix chili powder onion powder garlic powder seasoned salt paprika and cumin with water Pour over the meat
3. Simmer
Let the mixture simmer uncovered for 20 minutes Stir occasionally until thickened
Notes
Use 80/20 ground beef for juicier results Chicken can be substituted for a lighter option Store leftovers in an airtight container
- Prep Time: 10 minutes
- Cook Time: 20 minutes
- Category: Dinner
- Method: Stovetop
- Cuisine: Mexican
Nutrition
- Serving Size: 1 cup
- Calories: 250
- Sugar: 2g
- Sodium: 450mg
- Fat: 15g
- Saturated Fat: 6g
- Unsaturated Fat: 8g
- Trans Fat: 0g
- Carbohydrates: 8g
- Fiber: 2g
- Protein: 20g
- Cholesterol: 75mg
Keywords: taco meat recipe restaurant-quality taco meat homemade taco seasoning