Do you love chewy, fruity snacks but want to avoid artificial ingredients? Homemade fruit snacks are the perfect choice! They use real fruit, natural sweeteners, and simple ingredients you probably already have at home. Plus, they’re easy to make and much healthier than store-bought ones.
In this guide, you’ll learn how to make delicious fruit snacks from scratch. We’ll cover the best ingredients, step-by-step instructions, storage tips, and fun flavor ideas. Whether you want a kid-friendly snack, a quick energy boost, or a guilt-free treat, this guide has something for you. Let’s get started!
Table of contents
- Introduction to Homemade Fruit Snacks
- Essential Ingredients for Homemade Fruit Snacks
- Step-by-Step Guide to Making Homemade Fruit Snacks
- Homemade Fruit Snack Flavor Variations
- Storage, Shelf Life, and Drying Techniques
- Troubleshooting Common Issues
- Fun and Creative Ways to Use Homemade Fruit Snacks
- Frequently Asked Questions
- Conclusion and Final Thoughts
Introduction to Homemade Fruit Snacks
What Are Homemade Fruit Snacks?
Homemade fruit snacks are small, chewy treats made from fresh fruit, honey, and a thickener like gelatin or pectin. Unlike store-bought ones, which are filled with artificial colors and preservatives, these snacks contain only natural ingredients.
They come in different forms, such as fruit gummies, fruit chews, and fruit roll-ups. You can mix and match flavors to create tasty combinations. With so many options, you’ll never run out of ideas!
Why Make Your Own Instead of Buying?
Most store-bought fruit snacks contain corn syrup, artificial dyes, and chemical preservatives. These additives improve shelf life but offer little to no nutrition. Making them at home lets you enjoy a fresher, healthier treat.
Here’s why homemade is better:
- Healthier ingredients – Fresh fruit and natural sweeteners replace processed sugars.
- No artificial junk – You control what goes in, so there’s nothing fake.
- Custom flavors – Mix and match fruits for endless variety.
- Diet-friendly options – Make them sugar-free, organic, or vegan.
- Easy and fun – A great kitchen activity for kids and adults!
Health Benefits of DIY Fruit Snacks
Since homemade fruit snacks use real fruit, they provide important nutrients that store-bought ones often lack. Unlike processed snacks, these treats actually nourish your body.
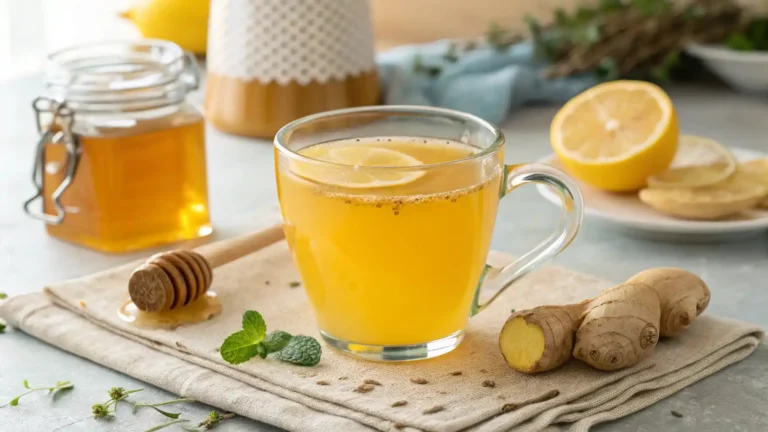
Rich in antioxidants – Especially when made with berries and citrus fruits.
Boosts immune health – Vitamin C helps strengthen your body’s defenses.
Good for digestion – Natural fruit fibers keep your gut happy.
Steady energy – No sugar crashes like store-bought snacks.
By making your own fruit snacks, you get a treat that’s both tasty and healthy. Plus, you can tweak the recipe to match your taste and diet.
Now that you know why homemade is the way to go, let’s move on to Part 2, where we’ll cover the key ingredients you need for the perfect batch!
Essential Ingredients for Homemade Fruit Snacks
Main Ingredient Breakdown: Fresh Fruits, Gelatin, and Sweeteners
To make homemade fruit snacks, you only need a handful of simple ingredients. Each one plays a crucial role in achieving the perfect taste and texture.
- Fresh or frozen fruit – This is the star of your fruit snacks! Fruits like strawberries, blueberries, mangoes, and apples provide natural sweetness and vibrant color. For the best results, blend them into a smooth puree.
- Gelatin or pectin – Gelatin gives the snacks a classic gummy texture, while pectin is a great plant-based alternative for those who prefer a vegan option.
- Sweeteners – Depending on your preference, you can use honey, maple syrup, or fruit juice for a natural touch of sweetness. For a sugar-free version, stevia or monk fruit are excellent choices.
- Lemon juice – Not only does this enhance the flavor, but it also helps preserve the bright color of your snacks.
- Water or fruit juice – This helps dissolve the gelatin or pectin while adding moisture to the mixture.
What is the Gelatin in Fruit Snacks Made Of?
Gelatin, the key ingredient that gives homemade fruit snacks their chewiness, is derived from collagen found in animal bones and tissues. It helps create the firm, bouncy texture that makes fruit snacks so fun to eat.
However, if you prefer a plant-based option, you can use agar-agar or pectin instead. Both work well to achieve a similar consistency while keeping your snacks completely vegan.
Vegan Alternatives: Agar-Agar and Pectin-Based Snacks
If you’re looking for a vegan-friendly alternative, agar-agar and fruit pectin are great substitutes for gelatin. Agar-agar, made from seaweed, sets firmer than gelatin, while pectin—found naturally in fruits—creates a softer texture.
Now that you know which ingredients to use, let’s move on to Part 3, where we’ll go through the step-by-step process of making homemade fruit snacks!
Step-by-Step Guide to Making Homemade Fruit Snacks
How to Choose the Right Fruits for Your Recipe
The secret to delicious homemade fruit snacks starts with selecting the best fruit. Here are some helpful tips:
- Fresh vs. frozen – While fresh fruit offers peak flavor, frozen fruit works just as well once thawed and blended.
- Naturally sweet options – Fruits like mangoes, peaches, and berries add natural sweetness, reducing the need for extra sugar.
- Mild-flavored fruits – Apples and pears make great base ingredients, blending well with stronger flavors like citrus and tropical fruits.
How to Make a Homemade Jelly Fruit (Recipe with Instructions)
Now, let’s get into the fun part—making your own fruit snacks! Follow this simple step-by-step recipe.
Ingredients:
- 2 cups fresh or frozen fruit
- ½ cup fruit juice or water
- 2 tbsp honey or maple syrup (optional)
- 2 tbsp lemon juice
- 3 tbsp gelatin (or 2 tbsp agar-agar for a vegan version)
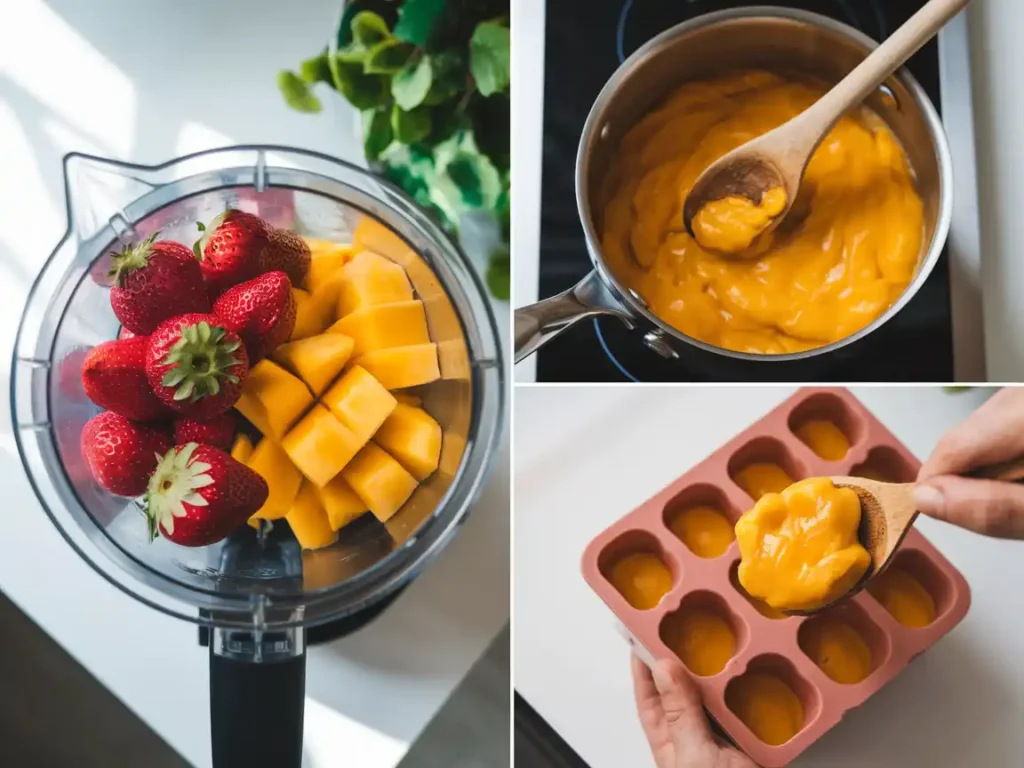
Instructions:
- Blend the fruit – First, add your fruit and lemon juice to a blender. Blend until completely smooth.
- Strain the mixture – If you prefer a smoother texture, strain the puree through a fine mesh sieve.
- Heat the liquid – Next, pour the puree into a saucepan over low heat. Stir in the fruit juice and sweetener.
- Add the thickener – Sprinkle gelatin (or agar-agar) over the warm mixture, stirring constantly until fully dissolved.
- Pour into molds – Carefully pour the mixture into silicone molds or a lined baking dish.
- Chill and set – Refrigerate for at least 2 hours or until firm.
- Cut and enjoy – If you used a baking dish, slice into bite-sized pieces before serving.
Different Sweetener Options: Honey, Maple Syrup, and Sugar-Free Choices
To customize the sweetness of your snacks, here are some great alternatives:
- Honey or maple syrup – Adds natural sweetness while keeping the flavors rich and smooth.
- Fruit juice – Orange, apple, or pineapple juice enhances sweetness without refined sugar.
- Sugar-free options – Stevia and monk fruit are excellent for those watching their sugar intake.
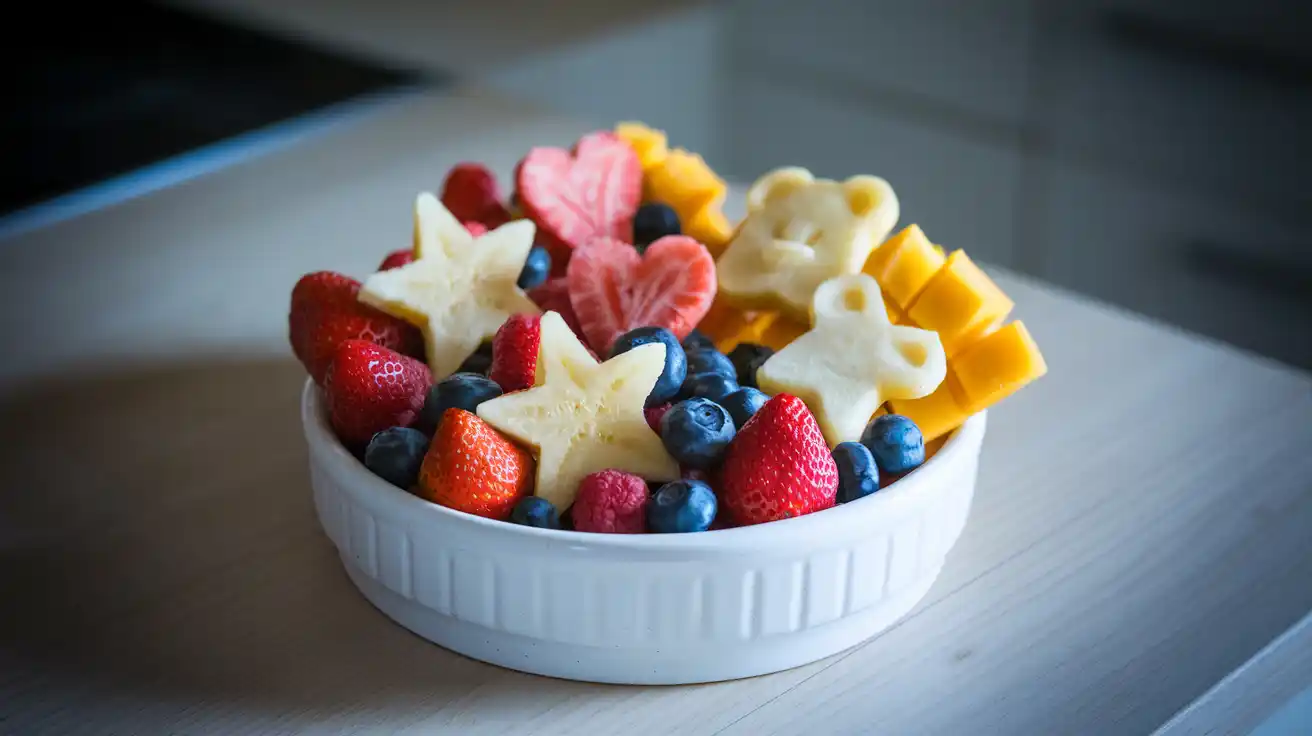
Shaping and Molding Fruit Snacks: Fun Ideas for Kids
Want to make your homemade fruit snacks even more exciting? Here are a few creative ideas:
- Use fun silicone molds – Try shapes like stars, animals, or hearts to make snack time more enjoyable.
- Layer different flavors – Pour one layer, let it set, and then add another color for a two-tone effect.
- Make fruit roll-ups – Spread the mixture thinly onto a baking sheet, dry it out, and roll it up for a chewy treat!
With these simple steps, you’ll have a delicious batch of homemade fruit snacks ready to enjoy! In Part 4, we’ll explore different flavor variations to keep things exciting.
Homemade Fruit Snack Flavor Variations
Strawberry, Blueberry, and Raspberry Combinations
Berries are among the best choices for homemade fruit snacks because they are naturally sweet, rich in antioxidants, and easy to blend. Plus, they pair well with many other fruits!
- Strawberry Delight – A mix of strawberries and honey creates a naturally sweet and slightly tangy treat.
- Blueberry Burst – Blueberries add a deep color and mild sweetness, making them perfect for chewy snacks.
- Triple Berry Blend – A combination of strawberries, raspberries, and blueberries delivers a bold, well-balanced flavor.
To make these flavors even better, add a splash of lemon juice for a refreshing citrus kick!
Tropical Blends: Pineapple, Mango, and Coconut
If you love tropical flavors, these combinations will give your fruit snacks an exotic, island-inspired taste.
- Pineapple Punch – Fresh pineapple combined with coconut water makes for a naturally refreshing treat.
- Mango Madness – Mango puree creates a creamy, smooth texture with a rich, tropical sweetness.
- Coconut-Lime Fusion – A blend of coconut milk and lime juice adds a tropical, slightly tart kick.
For an even more exotic flavor, consider mixing in passion fruit or papaya!
Green and Citrus-Based Snacks: Lemon, Lime, and Spinach
For a vitamin boost, green and citrus-based fruit snacks offer a refreshing, tangy bite with extra nutrients.
- Lemon-Lime Zest – This citrus blend delivers a sour punch balanced by natural fruit sweetness.
- Orange-Carrot Twist – Carrots add mild sweetness, while orange juice enhances the citrusy flavor.
- Green Power Blend – A mix of spinach, apple, and kiwi creates a nutrient-packed snack with a mild, fruity taste.
By experimenting with different fruit combinations, you can create fun, flavorful, and healthy snacks that suit your taste. Now, let’s go over how to store your homemade fruit snacks properly to keep them fresh!
Storage, Shelf Life, and Drying Techniques
How to Properly Store Homemade Fruit Snacks
Storing your homemade fruit snacks correctly is essential for keeping them fresh, flavorful, and chewy. Follow these easy steps to extend their shelf life:
- Refrigerate in an airtight container – This prevents moisture loss and keeps the texture soft. When stored properly, they stay fresh for up to 2 weeks.
- Use wax paper between layers – If stacking your snacks, wax paper prevents them from sticking together.
- Keep them in a cool, dry place – Heat and humidity can make fruit snacks sticky or cause them to spoil faster.
If you want to store them even longer, drying them out is a great option.
How to Dry Out Homemade Fruit Snacks for Longer Shelf Life
Drying your fruit snacks helps preserve them for months while maintaining their chewy texture. Here’s how to do it:
- Use a dehydrator – Set it to 135°F (57°C) and let the snacks dry for 6-8 hours until firm but still chewy.
- Try oven drying – If you don’t have a dehydrator, set your oven to its lowest temperature and leave the door slightly open. Bake for 4-6 hours, checking regularly to prevent over-drying.
- Air-dry naturally – If you live in a warm, dry climate, you can leave them uncovered on parchment paper for a day or two.
Using any of these methods will remove excess moisture while keeping your snacks flavorful and delicious.
Can You Freeze Homemade Fruit Snacks? Best Practices
Yes! Freezing is an excellent way to store homemade fruit snacks for even longer. Follow these steps to keep them fresh:
- Use a freezer-safe bag or container – Lay them in a single layer or separate them with wax paper to prevent clumping.
- Freeze for up to 3 months – While they won’t go bad after that, their texture may change slightly.
- Thaw before eating – Let them sit at room temperature for 10-15 minutes before enjoying.
With proper storage, you can keep your fruit snacks fresh, delicious, and ready to enjoy whenever you need a quick, healthy treat!
Troubleshooting Common Issues
Why Are My Homemade Fruit Snacks Too Soft or Sticky?
If your homemade fruit snacks turn out too soft or sticky, several factors could be the cause. Here’s how to fix them:
- Not enough thickener – Make sure you’re using the right amount of gelatin, agar-agar, or pectin. Increasing the thickener by just ½ to 1 tablespoon can make a big difference.
- Too much moisture – If the fruit puree is watery, cook it a little longer to reduce excess liquid before adding the thickener.
- Humidity issues – Storing fruit snacks in a humid environment can make them sticky. Try keeping them in the fridge with wax paper between layers.
How to Make Chewier or Firmer Fruit Snacks
If your fruit snacks are too soft, you can easily adjust the recipe to make them firmer. Here’s what to do:
- Increase the gelatin – Using an extra tablespoon of gelatin creates a firmer, chewier texture.
- Chill them longer – Letting the fruit snacks set for an extra hour in the fridge helps improve texture.
- Dry them slightly – If they’re still too soft, let them sit uncovered in the fridge overnight to remove extra moisture.
Fixing Flavor Issues: Too Tart, Too Sweet, or Bland?
If your fruit snacks don’t taste quite right, here’s how to adjust the flavor:
- Too tart? Add a little more honey, maple syrup, or fruit juice.
- Too sweet? Balance it out with extra lemon or lime juice.
- Bland flavor? Try using riper fruit, which naturally contains more sugar and stronger flavors.
Now that you know how to fix common issues, let’s explore some creative ways to use homemade fruit snacks!
Fun and Creative Ways to Use Homemade Fruit Snacks
Adding Fruit Snacks to Yogurt, Cereal, and Smoothies
Looking for ways to make your favorite foods even more fun? Try adding homemade fruit snacks to other healthy treats!
- Yogurt topping – Dice up your fruit snacks and mix them into plain or flavored yogurt for a fruity boost.
- Cereal mix-in – Toss small fruit snack pieces into granola or breakfast cereal for added chewiness and flavor.
- Smoothie blend – Blend a handful of fruit snacks into a smoothie for extra thickness and natural sweetness.
Using Fruit Snacks as a Natural Sweetener for Desserts
Since homemade fruit snacks are made from real fruit, they can double as a natural sweetener in other treats. Try these ideas:
- Melt and drizzle – Warm up fruit snacks in a small saucepan and drizzle the melted mixture over pancakes, waffles, or ice cream.
- Mix into energy bars – Chop fruit snacks into small bits and add them to homemade energy bars or protein balls.
- Bake into muffins – Use diced fruit snacks instead of chocolate chips in muffin recipes for a fun, fruity twist.
Homemade Fruit Snacks for Party Favors and Gifts
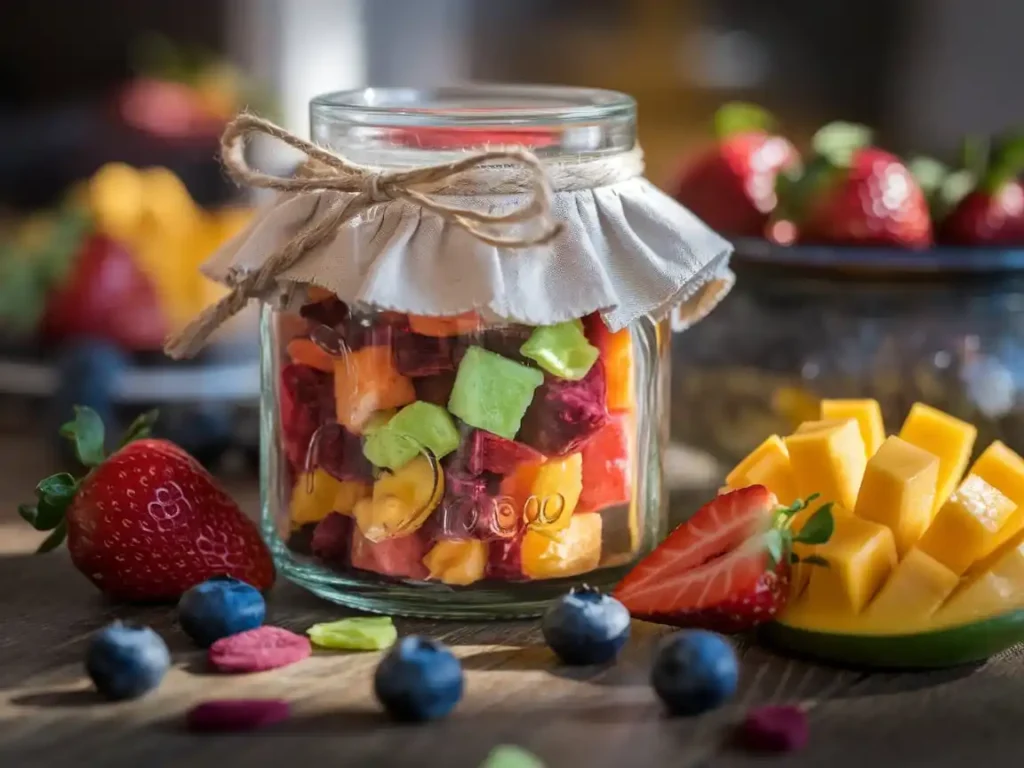
Want to share your delicious creations? Homemade fruit snacks make wonderful gifts or party favors. Here’s how to package them:
- Wrap in small bags – Use decorative treat bags and tie them with a ribbon for a festive look.
- Pair with a homemade label – Include a handwritten label with the flavor and date made.
- Make a variety pack – Create an assortment of different flavors and package them together for a fun, colorful gift.
With so many creative ways to enjoy homemade fruit snacks, you’ll never run out of ideas!
Frequently Asked Questions
What is the Main Ingredient in Fruit Snacks?
The key ingredient in homemade fruit snacks is real fruit. Fresh or frozen fruit is blended into a smooth puree, forming the base of these delicious treats. Other essential ingredients include:
- Gelatin or pectin – Gelatin gives fruit snacks a chewy texture, while pectin is a great vegan alternative.
- Sweeteners – Honey, maple syrup, or fruit juice add natural sweetness.
- Lemon juice – This balances flavor and preserves the bright color of the fruit.
By using wholesome ingredients, you can make fruit snacks that are both tasty and nutritious!
How to Make a Homemade Jelly Fruit?
Creating a homemade jelly fruit snack is quick and easy. Follow these simple steps:
- Blend the fruit – Puree 2 cups of fresh or frozen fruit with 2 tablespoons of lemon juice.
- Strain for a smooth texture – Use a fine-mesh sieve to remove any pulp or seeds.
- Heat and sweeten – Warm the puree in a saucepan, then stir in honey or maple syrup.
- Add thickener – Sprinkle in 3 tablespoons of gelatin (or 2 tablespoons of agar-agar for a vegan version). Stir until dissolved.
- Pour and set – Transfer the mixture to silicone molds and refrigerate for at least 2 hours until firm.
Once set, enjoy your homemade jelly fruit snacks as a fun and healthy treat!
What is the Gelatin in Fruit Snacks Made Of?
Traditional gelatin comes from collagen found in animal bones and connective tissues. It helps create the soft, chewy texture found in most fruit snacks.
For a plant-based alternative, try agar-agar or fruit pectin. Both work well and provide a slightly firmer texture.
How to Dry Out Homemade Fruit Snacks?
Drying your homemade fruit snacks extends their shelf life and creates a firmer texture. Here are a few methods:
- Dehydrator – Set to 135°F (57°C) and dry for 6-8 hours.
- Oven drying – Place snacks on a baking sheet, set the oven to its lowest temperature, and bake for 4-6 hours.
- Air-drying – In a warm, dry environment, leave fruit snacks uncovered on parchment paper for 24-48 hours.
By using these drying methods, you can enjoy chewy, long-lasting fruit snacks!
Conclusion and Final Thoughts
Why You Should Start Making Homemade Fruit Snacks
Making your own homemade fruit snacks is a great way to enjoy a healthier, tastier, and more natural alternative to store-bought versions. Unlike commercial fruit snacks filled with artificial flavors, preservatives, and excess sugar, your DIY version contains only real fruit and natural ingredients. Plus, they are:
- Customizable – Experiment with different fruits, flavors, and textures.
- Diet-friendly – Make them vegan, sugar-free, or organic to fit your lifestyle.
- Fun to create – A great kitchen project for kids and adults alike.
With so many benefits, there’s no reason not to give them a try!
Final Tips for Perfect Homemade Fruit Snacks
Before you start, here are some final tips to ensure success:
Choose ripe, sweet fruit – The riper the fruit, the better the natural sweetness.
Use the right thickener – Gelatin creates a classic gummy texture, while agar-agar is ideal for a plant-based option.
Store them properly – Keep them refrigerated for freshness or dry them for a longer shelf life.
Experiment with flavors – Mixing fruits or adding citrus juice enhances taste and variety.
By following this guide, you can confidently make delicious and healthy homemade fruit snacks at home. So grab your favorite fruits, get creative, and enjoy your very own batch of chewy, fruity goodness!
However, if you’d like, you can check out their Berry Tiramisu Trifle for another fruity dessert idea.
Homemade Fruit Snacks
Equipment
- Blender
- Saucepan
- Silicone Molds
Ingredients
- 2 cups Fresh or Frozen Fruit
- 1/2 cup Fruit Juice or Water
- 2 tbsp Honey or Maple Syrup optional
- 2 tbsp Lemon Juice
- 3 tbsp Gelatin or agar-agar for a vegan option
Instructions
- Blend the fruit and lemon juice in a blender until smooth.
- Strain the mixture to remove any pulp or seeds if desired for a smoother texture.
- In a saucepan, heat the fruit puree with the fruit juice or water and honey/maple syrup (if using) on low heat.
- Once the mixture is warm, sprinkle the gelatin over it and stir until it dissolves completely.
- Pour the mixture into silicone molds or a lined baking dish, and refrigerate for at least 2 hours or until firm.
- Once set, remove from molds or slice into bite-sized pieces and enjoy!