
Brookies are the perfect combination of two beloved treats: brownies and cookies. You get the chewy, gooey goodness of a brownie alongside the crispy, buttery texture of a cookie. It’s the ultimate dessert mash-up! But how do you assemble a brookie? In this article, we’ll guide you step by step—from gathering ingredients to baking the perfect layers. Let’s dive in!
What is a Brookie?
Before we dive into making your brookie, let’s first understand what it really is. If you’ve never tried one, don’t worry—we’ll explain it all for you!
What Makes a Brookie Different from Other Desserts?
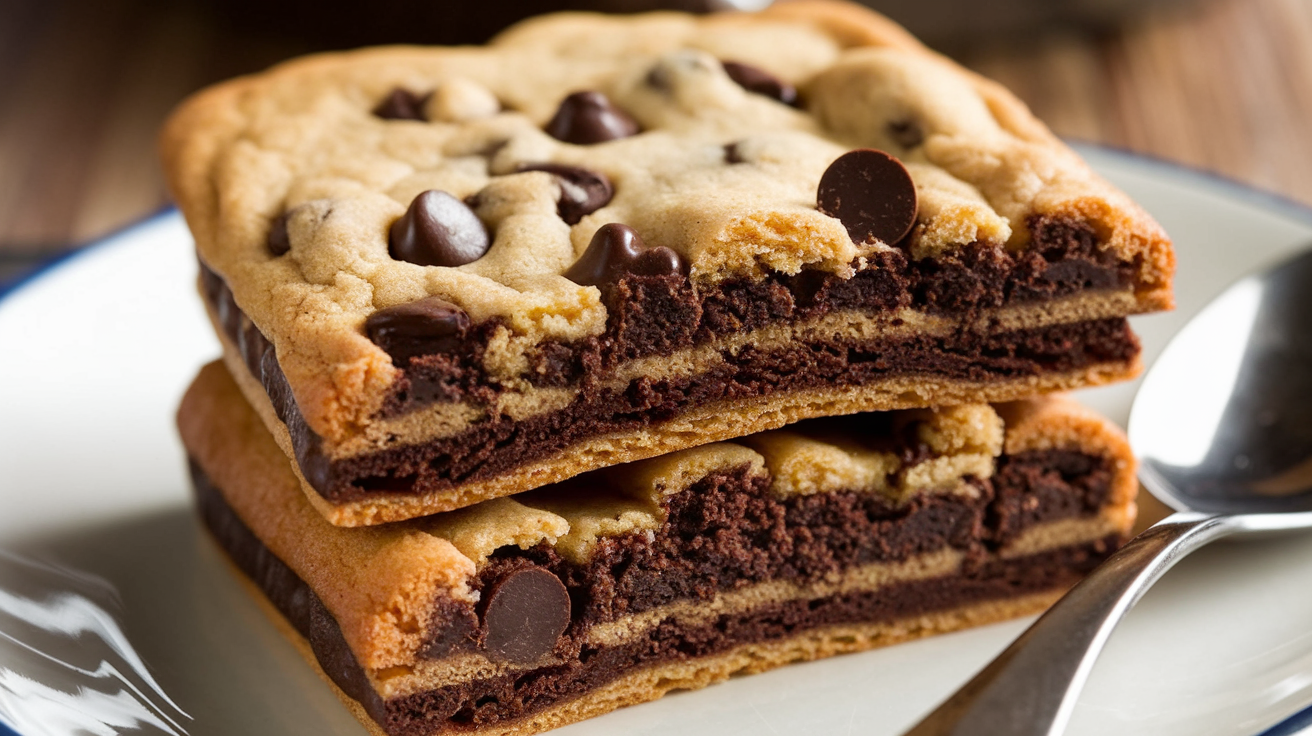
A brookie is a hybrid dessert that combines the fudgy texture of a brownie with the crispy edges of a cookie. It’s like having two desserts in one! The cookie layer is soft and buttery, while the brownie is rich and chocolatey. Together, they create the perfect balance of flavors and textures.
Unlike other hybrid desserts, the brookie doesn’t let either layer steal the show. Both layers complement each other perfectly. For this reason, it’s crucial to bake them just right: gooey in the center with crispy edges. But don’t worry—we’ll help you master that balance and ensure your brookie turns out perfect every time!
Why Brookies Are So Popular Right Now
Brookies are trending, and for good reason! First and foremost, they’re incredibly easy to make. No fancy techniques required. Second, they’re a great way to enjoy two desserts at once. After all, who can resist the combination of brownies and cookies?
Moreover, brookies are highly versatile. You can add chocolate chips, nuts, or even caramel for extra flavor. Plus, their popularity has grown due to their ability to suit any occasion. Whether you’re hosting a party or just craving something sweet, brookies are the perfect go-to treat.
Now that you know what a brookie is and why it’s so popular, let’s move on to the fun part: making it! In Part 2, we’ll go over the essential ingredients needed to assemble your brookie. Stay tuned!
Layering the Brownie Batter
Preparing the Brownie Layer
To begin assembling your brookie, you need to prepare the brownie layer. This is the rich, fudgy base that will hold everything together and balance the cookie’s sweetness. Start by following your favorite brownie recipe, or if you’re looking for a quick option, you can use a store-bought brownie mix. If you want to make it from scratch, melt butter and chocolate together, then whisk in sugar, eggs, and flour. Be sure not to overmix, as this can affect the texture.
Once your brownie batter is ready, you should have a thick and smooth consistency. Next, pour the batter into your baking pan, ensuring it is evenly spread across the bottom. You can use an 8×8-inch square pan for the best results, as it provides the perfect balance between a thick brownie layer and enough space to accommodate the cookie dough on top.
Tip: If you’re aiming for a more decadent brookie, consider adding chocolate chips to the brownie layer. This extra touch gives it a rich burst of flavor and texture that will complement the cookie dough above.
Pro Tip for Layering: To make the layering process easier, it helps to lightly grease the pan before pouring in the brownie batter. This ensures the brownie layer comes out cleanly after baking and prevents any sticky mishaps.
Assembling the Layers
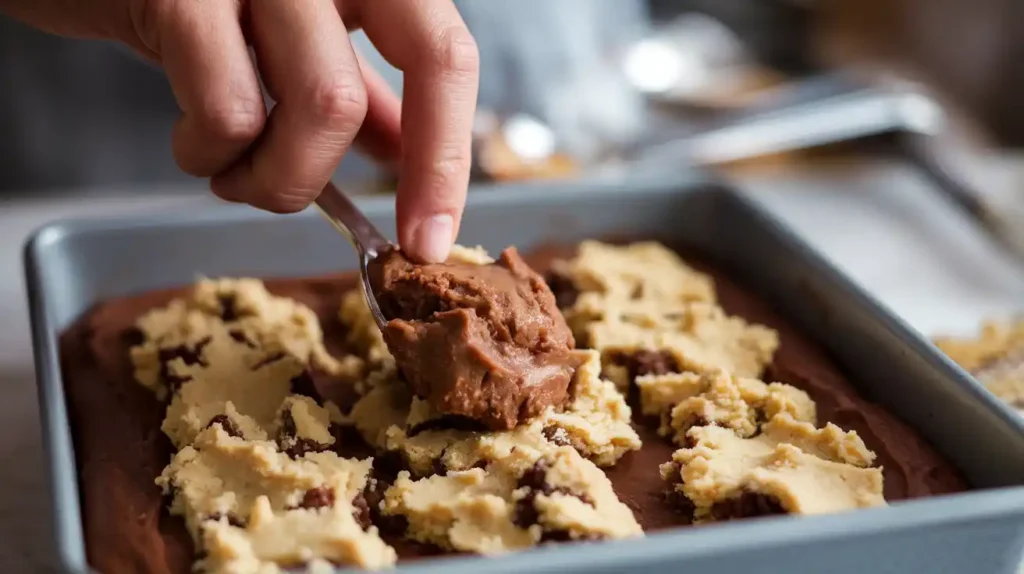
When you are ready to assemble the brookie, place the prepared brownie batter in the pan first. Once the batter is spread out evenly, you can begin to add the cookie dough layer on top. For this part, it’s essential to spoon the dough evenly over the brownie layer. You can gently spread it to cover the surface, but be careful not to disturb the brownie layer too much.
You’ll want to have a decent layer of cookie dough without overloading it, as too much dough can cause the brookie to be overly dense. It’s important to leave a little room for both the brownie and cookie to cook evenly.
How to assemble a brookie tip: Make sure to press the cookie dough layer gently. If it’s too thick in certain spots, the cookie dough may not bake evenly, resulting in an uneven texture.
Baking the Brookie
Baking the Brookie to Perfection
Now comes the exciting part: baking your brookie. Preheat the oven to 350°F (175°C) and place your assembled pan in the middle of the oven. Bake for about 25-30 minutes, but remember that oven times can vary. You’ll want to keep a close eye on the brookie as it bakes.
The cookie dough will begin to spread and golden, while the brownie layer should still stay somewhat fudgy. To test for doneness, insert a toothpick into the center of the brookie. If it comes out clean or with just a few crumbs, it’s ready. However, if you see gooey brownie batter, give it a few more minutes.
How to assemble a brookie tip: If the cookie layer begins to brown too quickly, you can cover the pan loosely with foil to prevent it from overcooking while the brownie layer finishes baking.
Cooling and Serving the Brookie
Once your brookie is baked to perfection, remove it from the oven and allow it to cool completely in the pan. This cooling process is crucial as it helps the brookie set and makes it easier to cut into neat squares or bars. You can allow it to cool at room temperature or speed up the process by refrigerating it for about 30 minutes.
After cooling, use a sharp knife to slice the brookie into squares. Each piece should have a nice balance of brownie and cookie, creating that irresistible layered effect. You can serve them as they are or add a scoop of vanilla ice cream for an indulgent treat.
If you’re looking for more delicious dessert ideas, you might enjoy exploring our cookie recipes or brownie variations that combine these same rich flavors in different ways!
How to Assemble a Brookie
Preparing the Brownie Layer
The first step in assembling your brookie is preparing the brownie layer. Begin by melting your butter and then mixing it with sugar, eggs, and vanilla extract. Once well combined, incorporate your dry ingredients such as cocoa powder, flour, baking powder, and salt. You should aim for a smooth batter without any lumps.
Next, pour this brownie batter into a baking pan and smooth it out evenly. This layer will create the base of your brookie, giving it the deliciously fudgy texture you love. If you want an even richer flavor, consider adding a handful of chocolate chips or chopped nuts to the batter.
Preparing the Cookie Dough Layer
While the brownie layer is the foundation, the cookie dough layer is what makes your brookie truly special. To make the cookie dough, combine softened butter with both brown sugar and white sugar, ensuring it’s light and fluffy. Then, add the eggs and vanilla extract before incorporating the dry ingredients: flour, baking soda, and a pinch of salt.
For the best results, fold in a generous amount of chocolate chips, or even a mix of dark and milk chocolate for extra richness. Once the cookie dough is ready, you’ll gently spoon it over the brownie batter, covering it as evenly as possible. Be sure not to press it down too much; you want to maintain a bit of texture that will bake perfectly on top of the brownies.
Baking Your Brookie
How Long to Bake a Brookie
Preheat your oven to 350°F (175°C), and once the brookie layers are assembled, it’s time to pop them into the oven. The baking time will typically range from 25 to 30 minutes, depending on your oven and the thickness of the layers. Keep a close eye on your brookie during the last few minutes—when the edges of the cookie dough layer turn golden brown, and a toothpick inserted into the center comes out with only a few moist crumbs, it’s time to remove the brookie from the oven.
Be careful not to overbake, as you want the center to remain slightly soft and gooey. If you prefer a more well-done brookie, leave it in for an extra 3 to 5 minutes. After baking, allow the brookie to cool for a few minutes before slicing.
Cooling and Serving Tips
Once the brookie is out of the oven, let it cool in the pan for about 15 minutes. This brief resting time helps the brookie set, making it easier to cut without the layers sliding apart. For the ultimate experience, serve your brookie while it’s still slightly warm so that the chocolate chips melt in every bite. You can also add a scoop of vanilla ice cream on top for an extra indulgence!
For more delicious recipes, check out our easy cookie recipes for more fun ways to satisfy your sweet tooth!
How to Assemble a Brookie
How to Cut and Serve Your Brookie
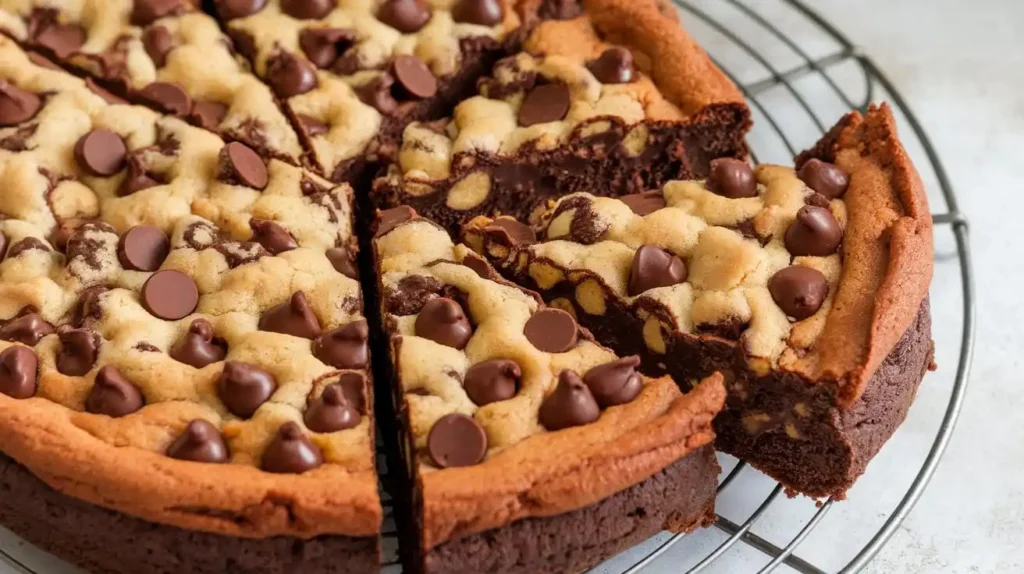
Once your brookie has cooled for a few minutes, the next step is cutting it into perfectly sized squares or rectangles. Using a sharp knife, carefully slice through both the brownie and cookie dough layers. For clean cuts, make sure to wipe the knife between each slice. This ensures that the rich chocolate layers won’t smudge, leaving you with beautifully neat pieces.
While it’s tempting to dig in right away, giving the brookie a little more time to cool can help set the layers even more. When you’re ready to serve, consider placing each piece on a plate with a scoop of vanilla ice cream or whipped cream on top. This simple addition will elevate the dessert to another level, making it even more irresistible!
Creative Variations on the Classic Brookie
While the traditional combination of brownies and cookies is unbeatable, there are many ways to get creative with your brookie. For example, you can mix in peanut butter chips or swirl in caramel for an added burst of flavor. Additionally, why not try adding a dash of espresso powder to the brownie layer to enhance the chocolate’s depth?
For an extra indulgence, you can even stuff your brookie with chunks of your favorite candy bar, like Snickers or Reese’s. The possibilities are endless, and the best part is you can make each brookie batch your own. Simply follow the basic “how to assemble a brookie” method, but feel free to experiment with the ingredients and flavors to create your signature treat.
Storing Your Brookie
How to Keep Your Brookie Fresh
If you happen to have any leftovers (although that’s unlikely!), it’s important to store them properly to maintain their freshness. To do so, place the brookie pieces in an airtight container at room temperature. This will keep the texture soft and fudgy for up to three days.
For longer storage, you can freeze your brookie pieces. Simply wrap them tightly in plastic wrap or foil and place them in a freezer-safe container. When you’re ready to enjoy them again, let them thaw at room temperature for a few hours, and they’ll taste just as delicious as when they were freshly baked.
Reheating Brookies for the Perfect Warm Bite
If you prefer your brookie warm, reheating is a breeze. To do so, pop a slice in the microwave for 15–20 seconds, just until it’s warm and the chocolate chips start to soften again. Alternatively, you can reheat a larger portion in the oven at 350°F (175°C) for about 5–10 minutes, until the brookie is heated through.
The key is not to overheat the brookie, as it can cause the layers to dry out. A few seconds in the microwave or a quick stint in the oven will bring back that warm, gooey texture that makes brookies so irresistible.
Troubleshooting Common Brookie Issues
Overcooked or Undercooked Brookie
When you’re learning how to assemble a brookie, one of the most common issues is getting the baking time just right. Overcooking can cause the cookie dough to become dry and crunchy, while undercooking can leave the brownie layer too gooey or the cookie layer raw. To avoid these problems, it’s essential to check your brookie with a toothpick around the 25-minute mark.
If you insert the toothpick into the center and it comes out clean or with only a few moist crumbs, your brookie is done. If you notice that the top is golden and the edges are firm, but the center still feels too soft, don’t worry—it will firm up as it cools. On the other hand, if you accidentally overbake it, you can still salvage it by serving it with a scoop of ice cream to balance out the dryness.
Uneven Layers or Sinking Cookie Dough
Another issue you may face when learning how to assemble a brookie is uneven layers or cookie dough that sinks into the brownie batter. This can happen if you don’t spread the brownie layer evenly or if the cookie dough is too heavy. To prevent this, make sure the brownie batter is level before adding the cookie dough. You should also spoon the cookie dough in small dollops and gently spread it out, but not too much, so it maintains its structure during baking.
Additionally, if the cookie dough layer is too dense, it might sink into the brownie batter. To avoid this, try chilling the cookie dough for a short time before adding it to the brownie layer. This can help the dough hold its shape and prevent sinking.
FAQs About Assembling a Brookie
Can I Make a Brookie Ahead of Time?
Absolutely! If you want to prepare your brookie in advance, you can assemble it and refrigerate it before baking. This allows the layers to set, and the flavors can even improve after resting. Just cover the pan tightly with plastic wrap and refrigerate for up to 24 hours before baking. When you’re ready, pop it in the oven, and you’ll have a fresh brookie in no time!
Can I Use a Different Type of Cookie Dough?
Yes, you can! While the classic chocolate chip cookie dough is the most common, you can experiment with different flavors. For instance, peanut butter cookie dough or oatmeal raisin dough can make a delicious twist on the traditional brookie. Just be sure to follow the basic “how to assemble a brookie” method, and adjust the baking time as needed, depending on the thickness and consistency of the dough.
How Can I Make My Brookie Extra Fudgy?
To make your brookie extra fudgy, use more butter in the brownie batter and ensure that you don’t overbake it. The key to achieving that fudgy texture is underbaking the brownie layer slightly. The residual heat will finish cooking the brownies without drying them out. You can also add more chocolate chips or chunks to the batter for an extra rich texture.
Can I Freeze My Brookie?
Yes, you can freeze brookie pieces for up to three months! To freeze, simply cut the brookie into individual pieces and wrap each one tightly in plastic wrap. Then, place the wrapped pieces in a freezer-safe container or bag. When you’re ready to enjoy them again, simply thaw at room temperature or reheat in the microwave for a few seconds.
Conclusion
In conclusion, learning how to assemble a brookie is a delightful and rewarding experience that combines two beloved desserts into one irresistible treat. By following the simple steps outlined above, from preparing the brownie and cookie dough layers to baking and serving, you can create a dessert that will impress everyone at the table.
Whether you’re a beginner or an experienced baker, this recipe offers plenty of room for creativity, allowing you to experiment with different flavors and mix-ins. Plus, with tips on storage, reheating, and troubleshooting common issues, you’re well-equipped to bake the perfect brookie every time.
So, the next time you’re craving something sweet, remember that assembling a brookie is an easy way to satisfy your dessert cravings. Happy baking!