
The red velvet cake’s signature color has an amazing backstory. A chemical reaction between cocoa powder, vinegar, and buttermilk created that deep red hue – not food coloring. Bakers in the 19th century got creative during World War II and used beet juice to boost the color.
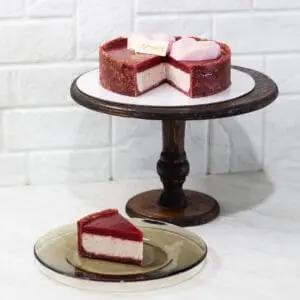
Red velvet cheesecake cupcakes now represent the perfect marriage of two classic desserts. These treats need just 20 minutes of prep time and make 20-24 perfectly sized cupcakes. The recipe works great for Christmas, Valentine’s Day, or any special occasion. Each bite delivers the perfect mix of sweetness and texture.
This complete guide will help you become skilled at making these delightful treats with a special strawberry-studded cheesecake filling. Your taste buds are in for something amazing, so let’s start baking!
Table of contents
Essential Ingredients for Perfect Red Velvet Cupcakes
Making perfect red velvet cheesecake cupcakes starts with the right ingredients. The role of each component will give you consistently delicious results.
Key dry ingredients and their roles
All-purpose flour is the foundation of these cupcakes, though cake flour can make them even lighter. Cocoa powder is a vital ingredient – use 2-4 teaspoons of unsweetened natural cocoa powder to create that subtle chocolate undertone. Baking soda works with buttermilk and vinegar to create the perfect rise and tender crumb.
Salt brings out the overall flavor, while granulated sugar adds both sweetness and moisture. Proper mixing of these dry ingredients helps them spread evenly throughout the batter.
Choosing the right cream cheese
Your choice of cream cheese will substantially affect the final result. Full-fat, block-style cream cheese works better than whipped or spreadable varieties. Philadelphia cream cheese stands out as a top choice, though other quality brands now give similar results.
The smoothest cheesecake filling comes from cream cheese at room temperature. Cold cream cheese can leave unwanted lumps in your mixture. A touch of sour cream mixed with the cream cheese creates an extra creamy texture.
Best food coloring options
The iconic red color needs careful attention. Gel food coloring gives more vibrant results than liquid options. Brands like Sugarflair and Wilton have become favorites in professional kitchens.
Here’s how to get the perfect red shade:
- Mix cocoa with vanilla essence
- Add gel coloring gradually using a toothpick
- Incorporate additional water as needed
- Blend until achieving a uniform paste
Natural food enthusiasts can mix beetroot powder with turmeric for an organic red color. All the same, natural colorings usually create a darker brown-red or terracotta shade instead of the classic bright red.
Buttermilk and vinegar not only improve the texture but also make the red color more intense naturally. These acidic ingredients react with cocoa powder’s anthocyanins to deepen the red hue. White vinegar or apple cider vinegar both do the job well.
The best results come from using both oil and butter in your recipe. Oil keeps the cupcakes moist, while butter adds that rich, classic taste. Pure vanilla extract adds depth to the overall flavor without overpowering the subtle chocolate notes.
You can make a buttermilk substitute by mixing whole milk with a teaspoon of lemon juice or white vinegar. Let it stand for 5-10 minutes before using it. This homemade version works just like store-bought buttermilk.
It’s worth mentioning that ingredient temperature makes a big difference. Room-temperature eggs, butter, and cream cheese blend smoothly and create an even batter. This attention to detail helps you make perfectly textured cupcakes every time.
Preparing the Red Velvet Cake Base
Becoming skilled at mixing red velvet cake batter needs precision and careful attention. These techniques will give a perfect batch of cupcakes every time.
Proper mixing technique
Start by sifting flour, cocoa powder, baking powder, and baking soda in a large bowl. Cut room-temperature butter into tablespoon-sized pieces and mix them with the dry ingredients until you see a sandy texture.
For the wet ingredients, combine:
- Eggs
- Buttermilk
- Vanilla extract
- Red food coloring (1-2 tablespoons liquid or 5-6 drops gel coloring)
The secret to amazing texture comes from creaming butter and sugar the right way. Mix these ingredients until the dense yellow mixture becomes light and fluffy, almost white in color. Slowly add oil while beating – this combination of fats creates incredibly moist yet airy cupcakes.
When the mixture looks right, add buttermilk and flour mixtures alternately on low speed. Your batter might have tiny butter pieces at first – they’ll melt while baking and make everything more buttery.
Getting the right batter consistency
You’ll know your red velvet batter is perfect by looking for specific signs. The texture should be smooth and velvety without lumps. The batter should fall in one continuous stream when lifted with a spatula instead of breaking up.
Best results come from:
- Mixing ingredients just until they combine after adding flour
- Not overmixing, which makes tough, dense cupcakes
- Using room temperature ingredients for better blending
Your final batter should look silky and slightly thick. You can adjust it if needed:
- Add a little liquid if it’s too thick
- Mix in more dry ingredients if it’s too runny
Fill your cupcake liners halfway to prevent overflow during baking. Tap the pan gently against the counter to release trapped air bubbles.
Vinegar and buttermilk do more than improve texture – they activate the baking soda and make the red color more vibrant. Mix these ingredients gently but well into your batter.
A digital scale helps measure ingredients accurately. If you use measuring cups, try the ‘scoop and level’ method to avoid extra flour that could dry out your cupcakes.
Note that good mixing affects both texture and color. Buttermilk and vinegar naturally boost the red shade, working with food coloring to create that classic red velvet look.
Making the Cheesecake Filling
A smooth, creamy filling turns red velvet cheesecake cupcakes from ordinary to extraordinary. The perfect cheesecake filling is what makes these treats exceptional.
Temperature tips for smooth filling
Your ingredients’ temperature is crucial to create silky-smooth filling. You should take cream cheese out of the fridge at least 4 hours before you start mixing. The final texture suffers when you use cold cream cheese because it creates a firm, lumpy batter.
Ingredients at room temperature mix naturally and stop the cream cheese from hardening when you add other ingredients. You can quickly warm cold eggs by putting them in warm water.
Preventing lumps in cream cheese mixture
Beat your cream cheese until it doubles in size. Here’s a method that works every time:
- Cut cream cheese into smaller pieces
- Mix on medium speed for 10 minutes
- Beat on high for 2 more minutes
Add sugar bit by bit into the soft cream cheese and scrape the bowl sides often. Mix in one egg at a time and wait until it’s fully mixed before adding another. This careful process keeps lumps out of your final mixture.
The paddle attachments work better than whisk attachments at low speed. A food processor is also great because its blades remove air instead of adding it.
Adding strawberry puree for extra flavor
Strawberry puree adds an exciting new flavor. Start by roasting 3-4 cups of strawberries until they become soft and juicy. Blend them smooth and strain to get the finest texture.
Your results will improve if you cook the puree with:
- Sugar
- Cornstarch
Cooking creates a concentrated strawberry sauce that makes the flavor stronger without affecting the texture. Add your prepared puree to the cheesecake filling after you’ve mixed in everything else.
Mix cream cheese with 1 cup sugar first to get the best consistency. Add eggs one at a time and wait until each is fully mixed in. At the end, fold in your strawberry puree and vanilla extract.
Note that too much mixing after adding eggs can trap air and cause cracks. Mix just enough to combine everything evenly. Put the finished filling in a piping bag to make it easier to work with.
The filling should be loose enough that any small lumps will dissolve on their own. You can push the mixture through a fine-mesh sieve as a last step if you still see lumps.
Assembling Your Cupcakes
The art and science of assembling red velvet cheesecake cupcakes blend together beautifully. This vital stage will determine how your treats look and taste.
Layering techniques
Put a scant 2 tablespoons of red velvet batter in each muffin cup. A large cookie scoop is a great way to get consistent portions. This base layer creates your cupcake’s foundation.
The next step adds the cheesecake filling – exactly one heaping tablespoon per cupcake. You’ll get the best results by keeping the cream cheese mixture in the center, away from the paper liner. Top it off with 2 more tablespoons of red velvet batter.
Proper filling amounts
Your perfect cupcake needs these exact measurements:
- First layer: 2 tablespoons red velvet batter
- Middle layer: 1 heaping tablespoon cheesecake filling
- Final layer: 2 tablespoons red velvet batter
Each liner should be about two-thirds full. This space lets the cupcakes rise properly while baking. Using the same amounts helps all cupcakes bake evenly.
When making a batch, split the batter evenly between cupcake liners. You’ll want about 3 tablespoons of total filling per cupcake. Without doubt, these proportions will give you perfectly sized treats.
Avoiding common assembly mistakes
Your cupcakes’ final look can suffer from several issues. The cream cheese mixture should never touch the cupcake liner walls. This contact often creates misshapen cupcakes after baking.
Watch out for these common mistakes:
- Overfilling the liners
- Uneven distribution of layers
- Cream cheese mixture touching liner edges
- Inconsistent portion sizes
These pro tips will help you improve your technique:
- Use a cookie scoop to get uniform portions
- Tap the pan gently against the counter to release air bubbles
- Keep cream cheese filling in the center
- Keep ingredients at consistent temperature
Check each cupcake after assembly to verify proper layering. It’s worth mentioning that frosting covers most small flaws. Still, proper assembly techniques make a big difference in texture and taste.
To finish with style, get a piping bag fitted with a 1M tip. This professional touch raises the presentation and hides surface flaws. On top of that, it looks great with chopped pecans as garnish for extra texture.
Your assembly process shapes both looks and taste. Careful attention to these details will give you excellent results every time. Focus on proper proportions and careful layering throughout assembly.
Baking and Cooling Tips
Red velvet cheesecake cupcakes need proper temperature control and cooling techniques to turn out perfect. These significant elements will give you consistently delightful results.
Ideal oven temperature
The first vital step is preheating. Your oven should be set to 350°F (175°C). This temperature creates the perfect balance between proper rise and moisture retention. The cupcake pan needs to sit on the middle rack to ensure even heat distribution.
The best results come from:
- Positioning racks before preheating
- Letting oven maintain temperature for 10 minutes after preheating
- Using an oven thermometer for accuracy
Visual cues for doneness
Baking takes 15-20 minutes. Time alone won’t guarantee perfect cupcakes. Look for these indicators:
The toothpick test remains the quickest way to check – insert it into the center of the largest cupcake. The toothpick should come out clean. The cream cheese filling should look slightly jiggly yet set.
Your cupcakes are ready when:
- They spring back after a light press
- Edges look set and pull away from liners
- Surface has a gentle bounce
- Center feels firm
Proper cooling methods
A step-by-step approach works best for cooling. Let the cupcakes sit in the pan for 2-5 minutes. Then move them to a wire cooling rack. This two-step process stops condensation from forming underneath.
Perfect cheesecake texture needs this cooling sequence:
- Keep cupcakes in the turned-off oven with door propped open for 15 minutes
- Take them out of the pan after initial cooling
- Set them on a wire rack to cool completely
- Refrigerate for at least 2 hours before frosting
This slow cooling prevents surface cracks. The cream cheese filling sets properly without becoming grainy or developing texture problems.
Room temperature should stay steady during cooling. Avoid drafts or big temperature changes. Rushed cooling often creates texture issues and uneven setting.
You can freeze your cupcakes after they cool completely. Make sure they’re thoroughly cooled before freezing or frosting. Warm cupcakes will make your frosting melt.
Conclusion
Red velvet cheesecake cupcakes are evidence of baking precision and creativity. These treats demand attention to detail, but mastering each step will help you create consistently delightful desserts. The result combines classic red velvet charm with creamy cheesecake indulgence.
Your success relies on several essential elements. You need carefully selected ingredients at proper temperatures, precise mixing techniques, and methodical assembly. The proper baking and cooling procedures also ensure your cupcakes achieve that perfect balance between cake and filling textures.
Practice guides you toward perfection. High-quality ingredients, proper temperature control, and attention to visual cues while baking will help you create stunning treats. Your red velvet cheesecake cupcakes will be worthy of any special occasion or celebration.
Show facts
Red Velvet Cheesecake Cupcakes
Equipment
- Muffin Pan
- Mixer
- Oven
Ingredients
Red Velvet Cake Base
- 2 cups all-purpose flour
- 2-4 tsp unsweetened cocoa powder natural
- 1 tsp baking soda
- 1/2 tsp salt
- 1 cup granulated sugar
- 1/2 cup vegetable oil
- 2 large eggs
- 1 tbsp vanilla extract
- 1 tbsp white vinegar
- 1 cup buttermilk
- 1-2 tbsp red food coloring
Cheesecake Filling
- 8 oz cream cheese room temperature
- 1/2 cup granulated sugar
- 1 large egg
- 1/2 cup strawberry puree optional, for flavor
Instructions
- Preheat the oven to 350°F (175°C). Line a muffin tin with paper liners.
- In a large bowl, sift together flour, cocoa powder, baking soda, and salt. Set aside.
- Cream together the butter and sugar in a separate bowl until light and fluffy. Add eggs, one at a time, and beat in the vanilla extract, vinegar, and red food coloring.
- Alternate adding the dry ingredients and buttermilk to the wet ingredients. Mix until just combined.
- For the cheesecake filling, beat cream cheese until smooth, then mix in sugar, egg, and strawberry puree. Blend until creamy and smooth.
- Fill each muffin liner halfway with red velvet batter, add a heaping tablespoon of cheesecake filling, and top with more red velvet batter.
- Bake for 20-25 minutes or until a toothpick comes out clean. Cool completely on a wire rack before serving.